
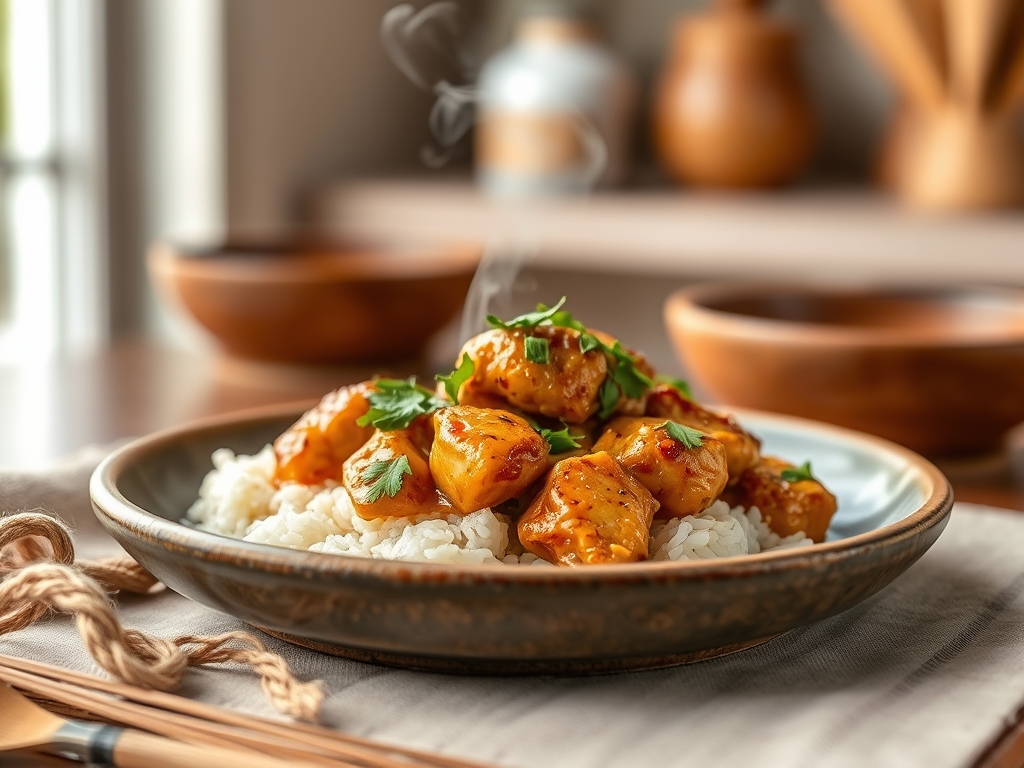
Picture the scent of toasted legumes colliding with the sharp, acidic bite of fresh lime and the creeping warmth of red chili paste. That intoxicating aroma is the hallmark of elite thai peanut chicken recipes. It is a dish that balances the four pillars of Southeast Asian flavor: sweet, sour, salty, and spicy. When you nail the texture, the sauce clings to the protein like a velvet glove rather than sliding off into a greasy pool at the bottom of your bowl. We are not just making dinner; we are engineering a sensory experience that rivals the best street stalls in Chiang Mai. To get there, we have to look past the surface level and understand how fats, sugars, and proteins interact under heat. This is about more than just tossing things in a pan. It is about the chemistry of a perfect emulsion and the physics of a sear. Grab your apron and your favorite heavy-bottomed skillet. We are going deep into the mechanics of flavor to ensure your next meal is nothing short of legendary.
The Gathers:
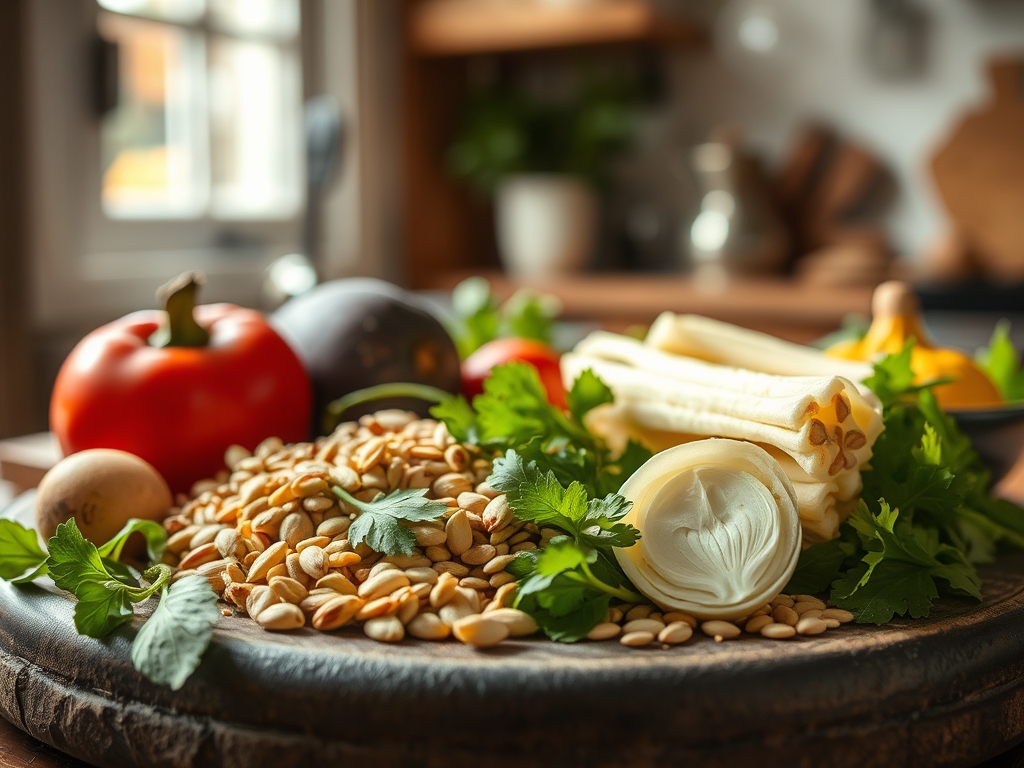
Your mise-en-place is the foundation of culinary success. For the protein, we are looking for chicken thighs rather than breasts. Thighs contain more connective tissue and intramuscular fat, which render beautifully to keep the meat succulent. You will need high-quality natural peanut butter; look for a brand where the oil separates at the top, indicating a lack of stabilizers like palm oil. This ensures a more viscous and authentic sauce.
For the aromatics, gather fresh ginger, garlic, and shallots. Use a microplane to grate the ginger into a fine paste; this breaks down the fibrous cellulose and releases the gingerol compounds more effectively than dicing. Your liquid base consists of full-fat coconut milk (the high lipid content is non-negotiable for a stable emulsion) and low-sodium soy sauce or tamari.
Smart Substitutions: If you are navigating a nut allergy, sunflower seed butter provides a similar earthy depth. For those avoiding soy, coconut aminos offer a slightly sweeter, lower-sodium alternative. If you cannot find bird's eye chilies, a generous squeeze of Sriracha or a spoonful of sambal oelek will provide the necessary piquant kick. Always keep a bunch of fresh cilantro and a few limes on standby to provide the essential bright finish.
The Clock
The "Chef's Flow" is all about maximizing efficiency so you are never scrambling while the pan is hot. Expect a 15-minute prep window and a 15-to-20-minute cook time. Your total commitment is roughly 35 minutes. The secret is to prepare your sauce slurry and chop all vegetables before the chicken even touches the heat. Because this dish relies on a quick sear, you do not want to be mincing garlic while your chicken is overcooking. By the time the skillet is screaming hot, your only job should be the physical act of cooking and monitoring the Maillard reaction.
The Masterclass
1. The Prep and Pat-Down
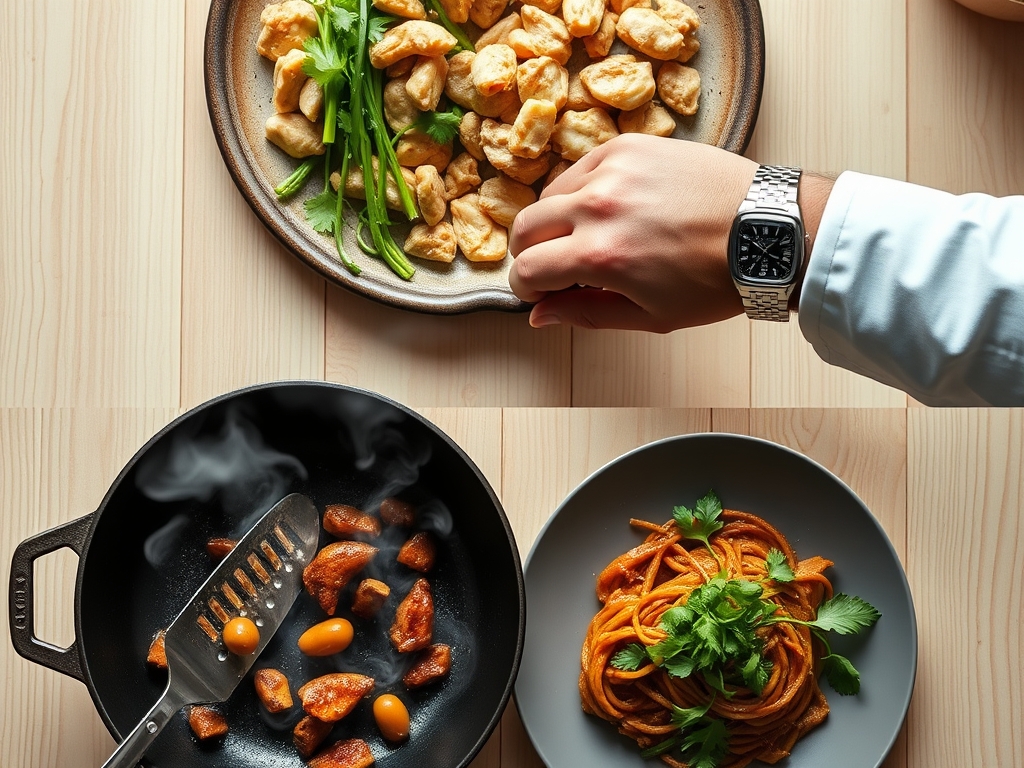
Start by slicing your chicken into uniform one-inch pieces. Use a bench scraper to move them efficiently to a bowl. The most critical step here is to pat the meat bone-dry with paper towels. Moisture is the enemy of a good sear.
Pro Tip: This prevents the formation of steam. If the surface of the meat is wet, the energy from the pan goes into evaporating water rather than triggering the Maillard reaction, which is the chemical dance between amino acids and reducing sugars that creates savory depth.
2. The High-Heat Sear
Heat a neutral oil with a high smoke point in your skillet. Once it shimmers, add the chicken in a single layer. Use tongs to ensure each piece has direct contact with the metal. Do not crowd the pan; work in batches if necessary.
Pro Tip: Avoid the urge to stir immediately. Let the chicken sit undisturbed for two minutes to develop a golden crust. This creates a complex flavor profile that a simple boil or steam can never replicate.
3. Aromatics Infusion
Push the chicken to the perimeter and drop your ginger, garlic, and shallots into the center. Stir constantly for about 60 seconds until they become fragrant but not brown.
Pro Tip: This is called blooming the aromatics. Fat is a highly effective solvent for flavor. By heating these ingredients in the oil first, you extract the fat-soluble essential oils, ensuring the flavor is distributed evenly throughout the entire dish.
4. Building the Slurry
In a separate small bowl, whisk together the peanut butter, coconut milk, red curry paste, and lime juice. Ensure the mixture is smooth before adding it to the skillet.
Pro Tip: Pre-mixing creates a stable emulsion. If you add these ingredients separately to a hot pan, the high heat can cause the coconut milk to "break" or curdle, resulting in a grainy sauce rather than a silky one.
5. The Deglaze
Pour the sauce mixture over the chicken. Use a wooden spoon to scrape up any brown bits stuck to the bottom of the pan.
Pro Tip: This process is deglazing. Those brown bits, known as fond, are concentrated pockets of flavor. Incorporating them back into the liquid transforms a simple sauce into a professional-grade glaze.
6. The Simmer and Reduction
Lower the heat to a medium-low. Let the sauce bubble gently until it thickens enough to coat the back of a spoon. This should take about five minutes.
Pro Tip: This stage allows for osmosis. As the chicken simmers in the sauce, the salt and seasonings penetrate the meat fibers, ensuring the flavor is not just on the outside but seasoned all the way through to the center.
7. The Vegetable Fold-In
Add your snap peas, bell peppers, or spinach during the last two minutes of cooking. You want them to be vibrant and crisp-tender, not mushy.
Pro Tip: This preserves the chlorophyll and structural integrity of the vegetables. Overcooking breaks down the cell walls, leading to a loss of both nutritional value and visual appeal.
8. The Final Brightening
Remove the pan from the heat and stir in a handful of chopped cilantro and a final squeeze of lime juice. Taste and adjust the salt levels with a splash of fish sauce if needed.
Pro Tip: This utilizes volatile aromatics. Fresh herbs and citrus juice lose their punch when exposed to prolonged heat. Adding them at the very end ensures the top notes of the dish remain sharp and refreshing.
The Deep Dive
From a nutritional standpoint, this dish is a powerhouse. It is high in protein and healthy monounsaturated fats from the peanuts. A standard serving contains roughly 35g of protein, 15g of carbohydrates, and 22g of fat. To make this Keto-friendly, simply swap the brown sugar for a monk fruit sweetener and serve over cauliflower rice. For a Vegan version, substitute the chicken with extra-firm pressed tofu or chickpeas and use a vegan-certified red curry paste.
The Fix-It:
- Sauce is too thick: Whisk in a tablespoon of warm water or chicken bone broth until the desired consistency is reached.
- Sauce is too salty: Add a teaspoon of rice vinegar or more lime juice. The acid will neutralize the perception of salt.
- Chicken is dry: You likely overcooked it. Next time, use a digital scale to ensure uniform pieces and pull the chicken when it hits 160 degrees Fahrenheit; thermal carryover will bring it to the safe 165 mark while it rests.
Meal Prep: When reheating, the peanut sauce will naturally thicken in the fridge. To restore "day-one" quality, add a splash of water before microwaving or reheating on the stove. This re-hydrates the proteins and fats, preventing the sauce from becoming oily or clumpy.
The Wrap-Up
Mastering thai peanut chicken recipes is a gateway to understanding the delicate balance of Southeast Asian cuisine. By focusing on the science of the sear and the stability of your emulsion, you elevate a simple weeknight meal into a gourmet experience. Remember, the best cooks are those who understand why things happen in the pan, not just what to put in it. Now, go serve this up, garnish with extra crushed peanuts, and enjoy the praise you are about to receive.
The Kitchen Table
Can I use peanut flour instead of peanut butter?
Yes, but you must whisk it with water and a teaspoon of oil first. Peanut flour lacks the fat content of butter, so the sauce may feel less viscous and rich without an added lipid source.
Why did my coconut milk separate?
This usually happens if the heat is too high or the milk is low-fat. High heat breaks the protein bonds holding the fat and water together. Always use full-fat coconut milk and keep the simmer gentle.
How do I make the chicken extra tender?
Try "velveting" the chicken. Coat the raw pieces in a mixture of cornstarch and a little oil before searing. This creates a thin protective barrier that locks in moisture and results in a silky, tender texture.
What is the best way to store leftovers?
Store in an airtight glass container for up to four days. Glass is preferable to plastic as it does not absorb the strong odors of garlic and fish sauce. Reheat with a splash of liquid to loosen the sauce.