
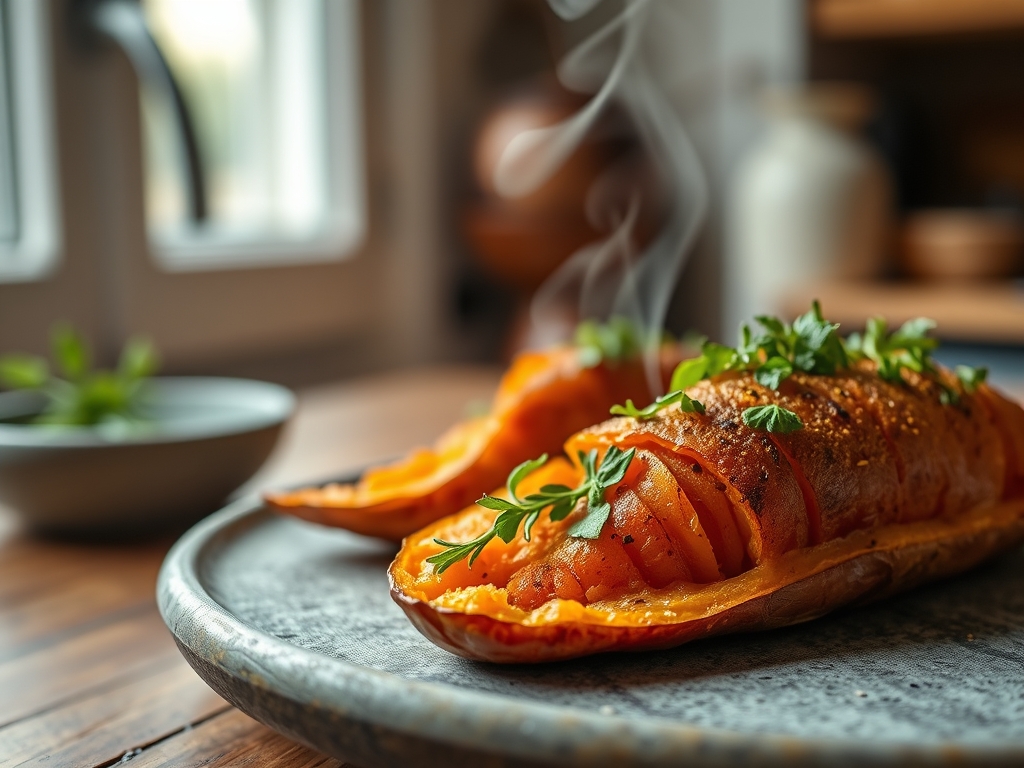
Picture the scene: your kitchen is filled with the scent of caramelizing sugars and earthy vanilla, a fragrance so thick it feels like a warm hug. When you are craving comfort but your schedule is screaming for speed, baked sweet potato recipes air fryer techniques are your absolute best friend. We are not just talking about a side dish; we are talking about a culinary transformation where the humble tuber meets high-velocity convection. The air fryer mimics a professional convection oven by circulating superheated air at a rapid rate, which triggers the Maillard reaction far faster than a standard oven ever could. This process creates a skin so crisp it crackles under your fork, while the interior transforms into a velvety, custardy dream. It is the ultimate weeknight win that feels like a weekend luxury.
The Gathers:
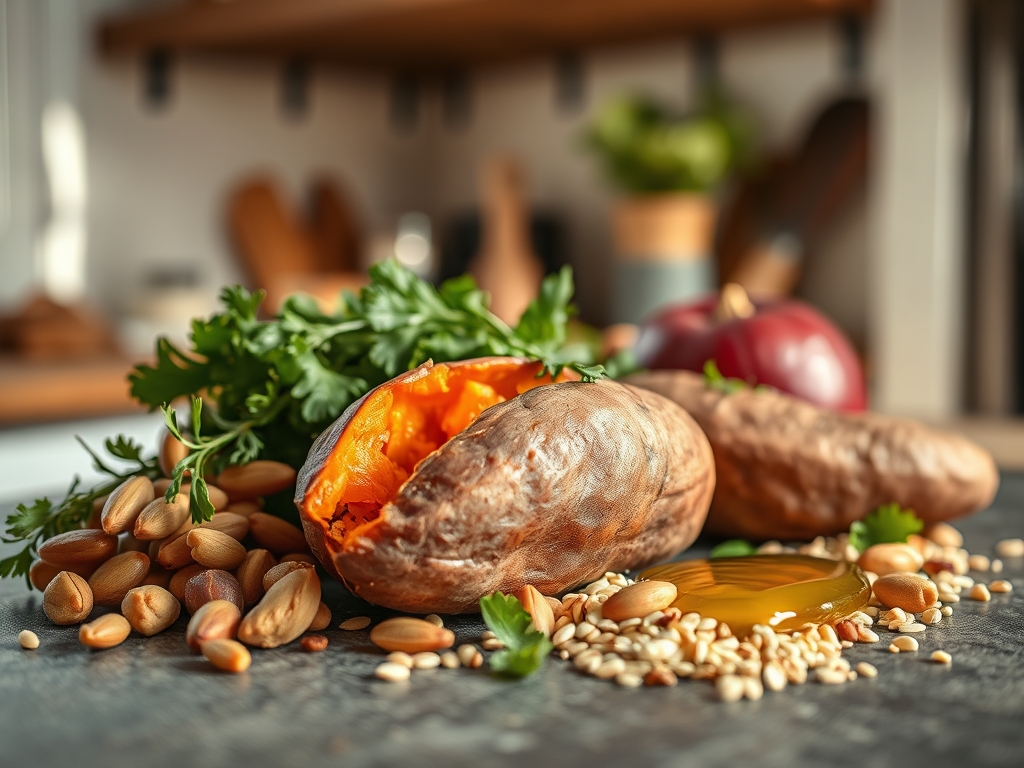
To achieve perfection, your mise-en-place must be intentional. Start with medium-sized Beauregard or Jewel sweet potatoes; their high moisture content ensures a luscious texture. You will need a high-smoke-point fat like avocado oil or clarified butter (ghee) to coat the skins. This lipid layer is essential because it facilitates heat transfer and prevents the skin from becoming leathery. Reach for your digital scale to ensure your potatoes are roughly 8 to 10 ounces each; uniformity is the secret to synchronized cooking. You will also want flaky sea salt and cracked black pepper for the initial seasoning.
Smart Substitutions: If you are out of avocado oil, refined coconut oil provides a subtle sweetness and a high smoke point of 450 degrees Fahrenheit. For those watching their sodium, a dusting of nutritional yeast adds a piquant, cheesy flavor without the salt bloat. If you prefer a savory profile, keep a microplane handy to zest fresh lime or grate garlic directly into your finishing butter.
The Clock:
Efficiency is the soul of the "Chef's Flow." Total active prep time is a mere five minutes, while the air fryer does the heavy lifting for 35 to 45 minutes.
The Flow:
0-5 Minutes: Scrub, dry, and season.
5-40 Minutes: Active air frying (The "Hands-Off" Zone).
40-45 Minutes: The Rest.
Do not underestimate the resting phase. This allows for thermal carryover, where the internal temperature continues to rise slightly, ensuring the very center of the potato is fully aerated and soft.
The Masterclass:
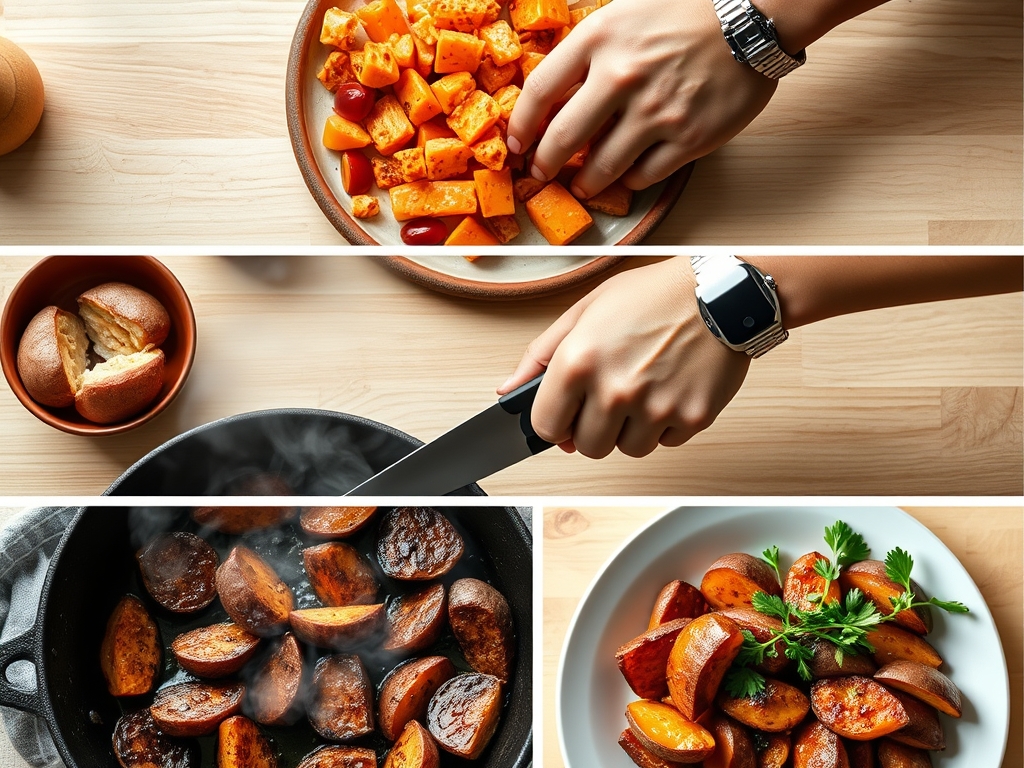
1. The Scrub and Dry
Use a stiff vegetable brush to remove any debris from the skin. After rinsing, use a lint-free kitchen towel to bone-dry each potato.
Pro Tip: Moisture is the enemy of the Maillard reaction. If the skin is damp, the air fryer will spend the first ten minutes evaporating surface water rather than crisping the skin. Drying ensures immediate fat-to-heat contact.
2. The Perforation Strategy
Take a fork or a sharp paring knife and prick the potato 5 to 6 times.
Pro Tip: This prevents a "potato explosion" by creating vents for steam to escape. Scientifically, this regulates internal pressure and prevents the cellular structure from rupturing violently, which keeps the interior fluffy rather than gummy.
3. The Lipid Coating
Massage a teaspoon of oil over the entire surface. Use your hands to ensure every nook and cranny is glistening.
Pro Tip: Fat acts as a thermal conductor. By coating the skin, you are creating a microscopic deep-fry effect on the surface, which leads to that coveted "shatter-crisp" texture.
4. The Initial Blast
Place the potatoes in the basket, ensuring they do not touch. Set your air fryer to 400 degrees Fahrenheit.
Pro Tip: Airflow is everything. If you crowd the basket, you create "cold spots" where the air cannot circulate, leading to uneven cooking and soggy sides. Use tongs to position them with at least an inch of clearance.
5. The Halfway Flip
At the 20-minute mark, use your tongs to rotate the potatoes.
Pro Tip: Even though air fryers circulate air, the heating element is usually at the top. Flipping ensures that the bottom side, which sits on the tray, gets equal exposure to the direct infrared heat.
6. The Tenderness Test
At 35 minutes, squeeze the sides of the potato (with an oven mitt!). It should give easily under pressure.
Pro Tip: Use an instant-read thermometer to check for an internal temperature of 205 to 210 degrees Fahrenheit. This is the "sweet spot" where starches have fully converted to maltose.
7. The Rest and Slice
Remove the potatoes and let them sit on a bench scraper or cutting board for five minutes. Slice down the center and fluff with a fork.
Pro Tip: Resting allows the steam to redistribute. If you cut it open instantly, too much moisture escapes as a cloud of steam, which can leave the remaining flesh dry.
8. The Emulsified Finish
Add your butter or toppings while the potato is screaming hot.
Pro Tip: Adding cold butter to a hot potato creates a quick emulsion. The fat melts into the starch cells, creating a viscous, creamy mouthfeel that is the hallmark of a professional side dish.
The Deep Dive:
From a nutritional standpoint, sweet potatoes are a powerhouse of Beta-Carotene and fiber. One medium potato provides over 100 percent of your daily Vitamin A.
Dietary Swaps:
- Vegan: Swap butter for a drizzle of tahini or extra virgin olive oil.
- Keto: While sweet potatoes are higher in carbs, you can enjoy a smaller portion (half a potato) loaded with high-fat toppings like bacon and sour cream to stay within your macros.
- GF: This recipe is naturally gluten-free; just ensure your spice blends are certified.
The Fix-It:
- Pitfall: Hard centers. Fix: Your potatoes were too large. Next time, slice them in half lengthwise to increase surface area and reduce cook time.
- Pitfall: Burnt skin but raw inside. Fix: Lower the temp to 375 degrees Fahrenheit. This allows the heat to penetrate the core before the sugars on the skin carbonize.
- Pitfall: Soggy skin. Fix: You likely wrapped them in foil. Never use foil in an air fryer for this recipe; it traps steam and boils the potato instead of roasting it.
Meal Prep: To reheat and maintain "day-one" quality, place the cold potato back in the air fryer at 350 degrees Fahrenheit for 5 to 7 minutes. This recrisps the skin, a feat a microwave could never achieve.
The Wrap-Up:
There you have it, the definitive guide to mastering baked sweet potato recipes air fryer style. By understanding the science of airflow and the magic of the Maillard reaction, you have turned a simple root vegetable into a gourmet canvas. Whether you top it with a savory chili or a sweet sprinkle of cinnamon, you are now equipped with the technical prowess to nail it every single time. Now, go grab those tongs and get frying!
The Kitchen Table:
Why is my air fryer sweet potato still hard?
The potato was likely too large or the temperature was too high, causing the outside to cook before the heat reached the center. Use a digital scale to pick 8-ounce potatoes and ensure they cook for at least 35 minutes.
Do I need to soak sweet potatoes before air frying?
For whole "baked" potatoes, soaking is unnecessary. Soaking is only required for fries to remove excess surface starch. For a whole potato, a simple scrub and thorough drying with a kitchen towel is the professional standard for crisp skin.
Can I use parchment paper in the air fryer?
Yes, but only if the potato is weighing it down. If the paper flies into the heating element, it is a fire hazard. For the best airflow and crispest results, skip the paper and place the potato directly on the grate.
How do I make the skin extra crispy?
The secret is a combination of high-smoke-point oil and salt. The salt draws out surface moisture, while the oil facilitates rapid heat transfer. Ensure the potato is bone-dry before applying the oil to prevent steaming.