
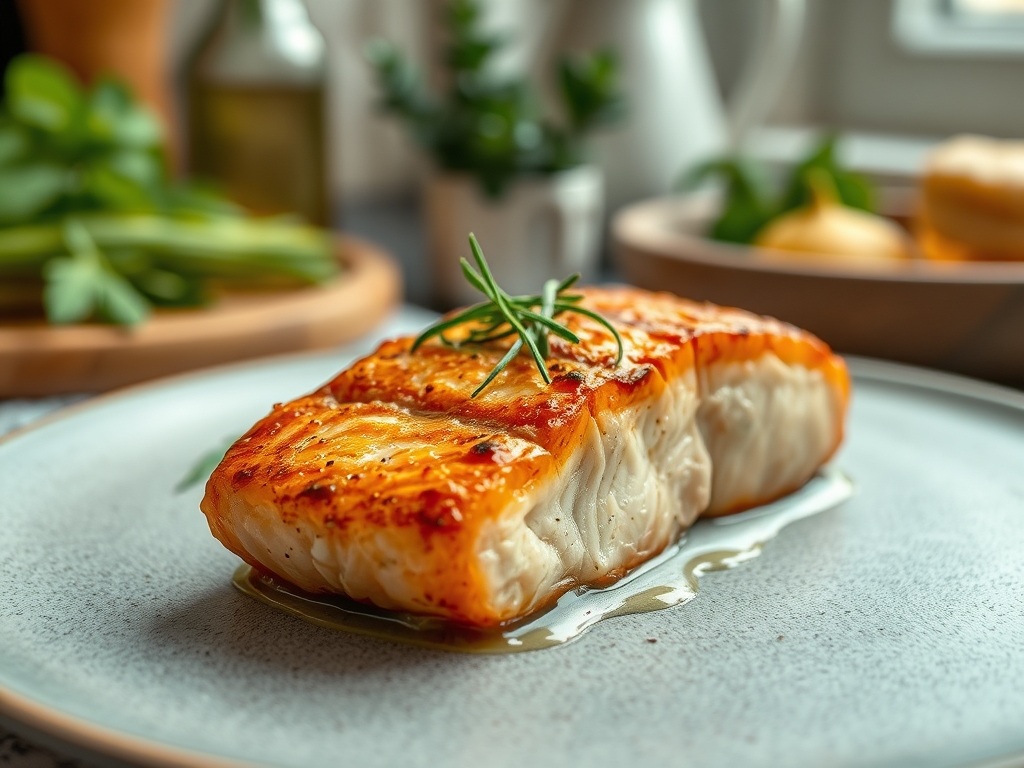
Imagine the sound of a heavy-bottomed sheet pan sliding into a preheated oven while the air thickens with the scent of toasted allium and sizzling lipids. There is a specific, primal joy in mastering garlic salmon recipes oven techniques because they bridge the gap between high-end bistro quality and Tuesday night convenience. We are talking about fillets that boast a translucent, buttery center and a golden, piquant crust that shatters slightly under the fork. This is not just dinner; it is an exercise in heat transfer and aromatic infusion. If you have ever struggled with dry, chalky fish or garlic that turns bitter and burnt before the protein is even opaque, you are in the right place. We are going to break down the molecular magic of the Maillard reaction and the structural integrity of fish oils to ensure every bite is a masterclass in texture.
To achieve that restaurant-grade finish, we need to treat our ingredients with technical respect. Forget haphazardly tossing things into a bowl. We are going to use a microplane to create a fine garlic paste, ensuring the essential oils are fully released and ready to emulsify with our fats. This process maximizes the surface area for flavor distribution without the risk of large, acrid chunks of burnt garlic. Grab your digital scale and your favorite apron; we are diving deep into the chemistry of the perfect bake.
The Gathers:
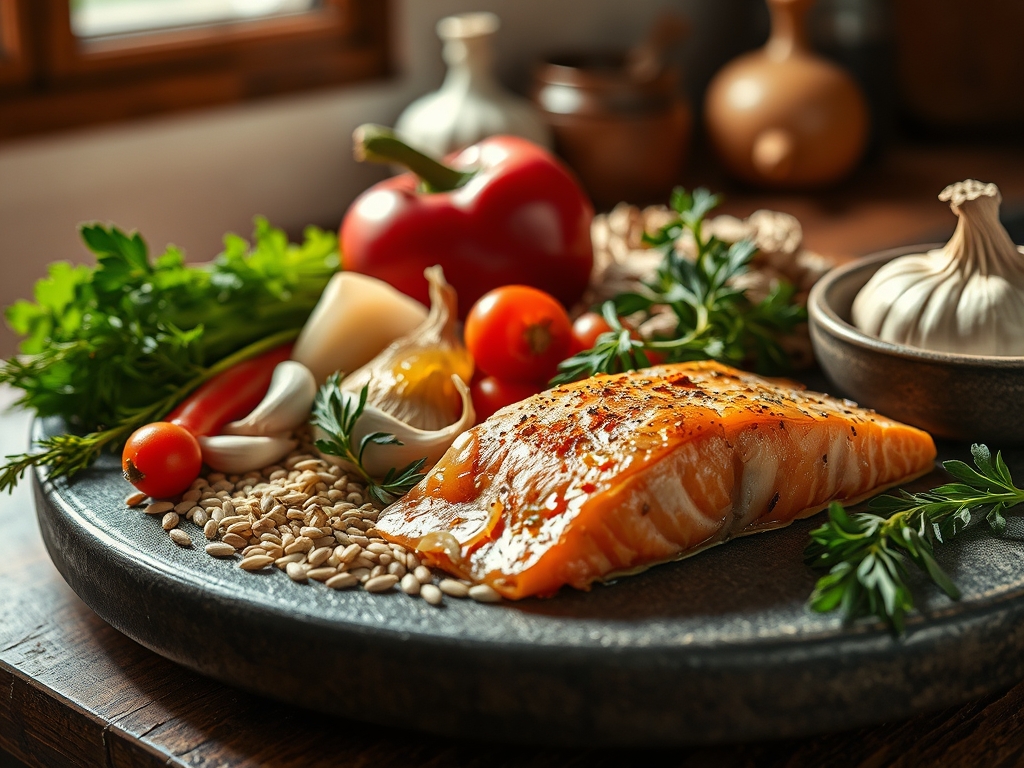
Setting up your mise-en-place is the difference between a frantic kitchen and a fluid one. For our primary protein, we are looking for 6-ounce fillets of Atlantic or King salmon. Look for deep pigmentation and firm muscle fibers; this indicates a high concentration of astaxanthin and healthy fats. You will need four cloves of fresh garlic, high-quality unsalted butter (which allows us to control the sodium levels precisely), and a viscous, cold-pressed olive oil to raise the smoke point of our fat blend.
For the aromatics, gather fresh sprigs of thyme and rosemary. These contain volatile oils that will infuse the cooking fat as it renders. You will also need a bright, acidic component; a fresh lemon is non-negotiable. The citric acid acts as a chemical foil to the rich, fatty acids in the fish. Finally, grab some flaky sea salt and freshly cracked black pepper. The coarse texture of the salt is essential for creating a crust that offers a structural contrast to the tender flesh.
Smart Substitutions:
If you are avoiding dairy, swap the butter for a high-quality avocado oil or a vegan ghee. For those who want a deeper umami profile, a teaspoon of white miso paste can be whisked into the garlic butter to provide a fermented, savory depth. If fresh garlic is unavailable, avoid the pre-minced jars in water; instead, use a high-quality garlic confit or a small amount of potent garlic oil to maintain that authentic, sharp profile.
The Clock
Efficiency in the kitchen is all about the Chef's Flow. This entire process takes approximately 25 minutes from the first slice of the knife to the final garnish.
- Prep Time (10 minutes): This includes patting the fish dry to remove surface moisture, mincing the aromatics, and preparing the emulsion.
- Active Cook Time (12 to 15 minutes): This varies depending on the thickness of your fillets and your desired level of doneness.
- Resting Time (3 minutes): Often overlooked, this allows the muscle fibers to relax and reabsorb juices.
The "Flow" dictates that you preheat your oven and your sheet pan simultaneously. Placing the fish on a preheated surface initiates an immediate sear on the skin side, preventing sticking and ensuring a crisp texture through conductive heat.
The Masterclass
1. The Desiccation Ritual
Start by using paper towels to aggressively pat the salmon fillets dry on all sides. Moisture is the enemy of the Maillard reaction. If the surface is wet, the oven's energy will be spent evaporating water rather than browning the proteins.
Pro Tip: This is known as surface evaporation. By removing moisture, you allow the surface temperature to rise rapidly above 285 degrees Fahrenheit, which is the threshold for browning and flavor development.
2. The Garlic Emulsion
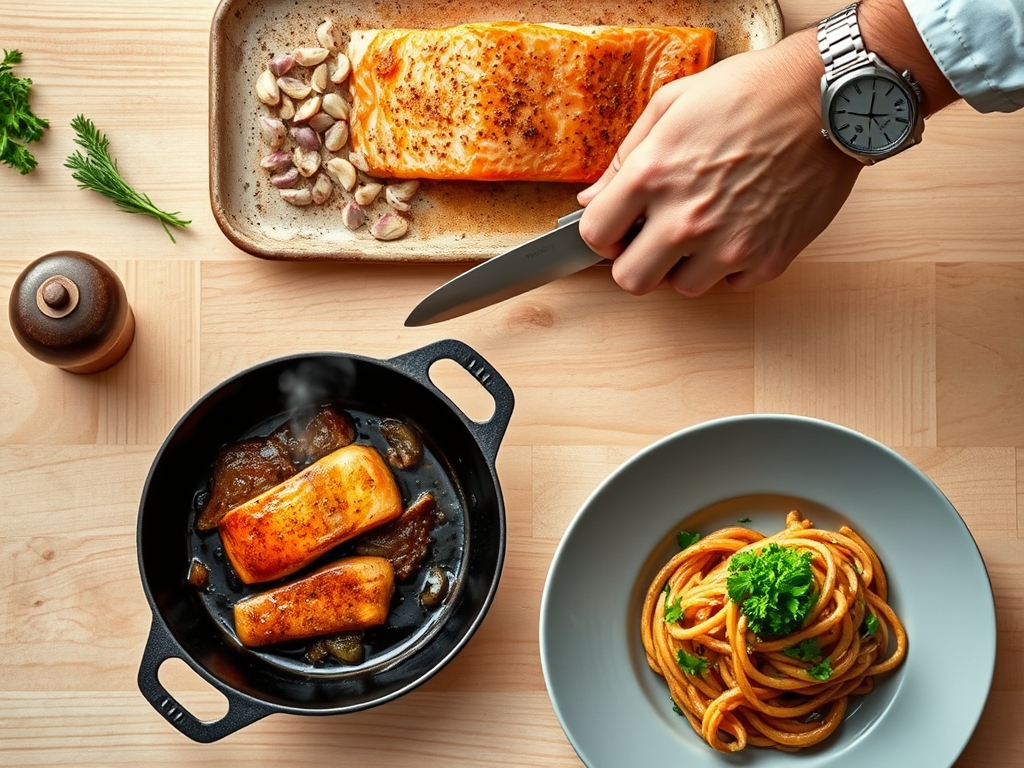
Using a microplane or a heavy chef's knife, turn your garlic into a fine paste. In a small saucier or microwave-safe bowl, melt your butter and whisk in the garlic, olive oil, and chopped herbs. Use a whisk to aerate the mixture slightly, ensuring the garlic is suspended evenly in the fat.
Pro Tip: Fat is a flavor carrier. By creating an emulsion of butter and oil, you are ensuring that the fat-soluble flavor compounds in the garlic are distributed evenly across every square millimeter of the fish.
3. The Seasoning Layer
Place your fillets on a parchment-lined, preheated baking sheet. Use a silicone pastry brush to coat the salmon generously with the garlic-herb mixture. Sprinkle the flaky sea salt from a height of about twelve inches to ensure an even distribution.
Pro Tip: Seasoning from a height prevents "hot spots" of salt. The salt also acts as a denaturant, slightly breaking down the surface proteins to create a more tender "bite" once cooked.
4. The Thermal Transition
Slide the tray into the center rack of the oven at 400 degrees Fahrenheit. If your oven has a convection setting, use it to circulate the hot air, which promotes even browning through forced convection.
Pro Tip: Watch for the albumin. If you see white streaks of protein (albumin) pushing out of the fish, it means the muscle fibers are contracting too quickly due to high heat. Aim for a gentle bake to keep the moisture locked inside.
5. The Acidic Finish
Halfway through the baking process, slide the tray out and quickly squeeze fresh lemon juice over the fillets. This deglazes the surface slightly and incorporates the acid into the rendering fats.
Pro Tip: Acid cuts through the viscous nature of the salmon's natural oils. This chemical balance makes the dish feel lighter on the palate and enhances the perception of salt.
6. The Carryover Rest
Once the internal temperature reaches 130 degrees Fahrenheit for medium-rare or 135 for medium, remove the pan from the oven. Use tongs to carefully transfer the fillets to a warm plate.
Pro Tip: This is thermal carryover. The internal temperature will continue to rise by 5 degrees after the fish is removed from the heat. Resting prevents the juices from rushing out the moment you slide your fork in.
7. The Final Garnish
Finish with a fresh dusting of parsley and a final sprinkle of lemon zest. The zest contains concentrated oils that provide a floral aroma that juice alone cannot provide.
Pro Tip: Aromatics are the first thing we "taste" through our olfactory system. Adding fresh herbs at the very end ensures the delicate volatile compounds do not dissipate in the high heat of the oven.
The Deep Dive
Macro Nutrition:
Salmon is a nutritional powerhouse. A standard 6-ounce serving provides approximately 34 grams of high-quality protein and 20 grams of heart-healthy fats, including Omega-3 fatty acids. It is naturally low in carbohydrates, making it a staple for metabolic health.
Dietary Swaps:
- Keto: This recipe is naturally keto-compliant. Increase the butter ratio for higher fat macros.
- Vegan: Swap the salmon for thick slices of cauliflower "steak" or firm tofu, following the same garlic-infusion steps.
- GF: This recipe is naturally gluten-free. Ensure your spices are certified if you have extreme sensitivities.
The Fix-It: Troubleshooting Common Pitfalls
- The Garlic is Burnt: This happens if the oven is too hot or the garlic pieces are too large. Fix: Use a garlic press or microplane to create a paste, and ensure it is mixed with oil to insulate it from direct heat.
- The Skin is Soggy: This is caused by trapped steam. Fix: Always preheat your baking sheet and ensure the skin is bone-dry before it touches the metal.
- The Fish is Dry: You likely missed the carryover window. Fix: Use a digital thermometer. Pull the fish at 130 degrees Fahrenheit; do not wait for it to look "done" in the oven.
Meal Prep & Reheating:
To maintain "day-one" quality, reheat salmon gently. Avoid the microwave, which turns the fats rancid and the protein rubbery. Instead, place the fish in a 275-degree oven with a splash of water and cover with foil to create a gentle steam environment. This preserves the structural integrity of the lipids.
The Wrap-Up
Mastering garlic salmon recipes oven style is about more than just following a timer; it is about understanding how heat interacts with protein and fat. By utilizing tools like the microplane and digital thermometer, you move from "guessing" to "knowing." This dish is elegant enough for a dinner party but fast enough for a solo weeknight meal. The combination of pungent garlic, creamy butter, and zesty lemon creates a flavor profile that is timeless. Now, go forth, preheat that oven, and treat yourself to the buttery, flaky perfection you deserve!
The Kitchen Table
How do I tell if salmon is done without a thermometer?
Press the top of the fillet gently with a fork or your finger. If the flesh flakes easily along the natural white lines (the fat layers), it is ready. It should feel firm but have a slight give.
Can I use frozen salmon for this recipe?
Yes, but you must thaw it completely in the refrigerator first. Pat it exceptionally dry with paper towels, as frozen fish tends to release more moisture during the cooking process, which can hinder browning.
Why does my salmon have white stuff on it?
That white substance is albumin, a harmless protein. It appears when the salmon is cooked too quickly, causing the muscle fibers to contract and push the protein to the surface. Lowering the temperature slightly can prevent this.
What is the best rack position in the oven?
The middle rack is ideal for even heat distribution. If you want a more charred, caramelized top, you can move it to the top rack for the final two minutes of cooking under the broiler.
How long does cooked garlic salmon last in the fridge?
Stored in an airtight container, it will stay fresh for up to three days. For the best texture, repurpose cold leftovers into a salad or a grain bowl rather than aggressively reheating them.