
Picture the sound of a heavy-bottomed skillet hitting a gas burner; that sharp, metallic ring that signals the start of something magnificent. There is a specific, primal magic in the way fat renders from a cold pan, transitioning from opaque white to a shimmering, translucent liquid that smells like home and high-end bistros all at once. When you are staring at a pound of protein and the clock is ticking, these gr beef recipes are your absolute lifeline. We are moving past the basic burger and the soggy taco. We are diving into the world of rapid-fire, high-flavor profiles that utilize the science of heat to transform humble ingredients into a five-star experience in under twenty minutes. This is about more than just feeding a crowd; it is about mastering the art of the quick sear and the perfect emulsion. We are going to harness the power of the Maillard reaction to create deep, complex crusts that trick your taste buds into thinking you spent hours over a slow-cooker.
The Gathers:
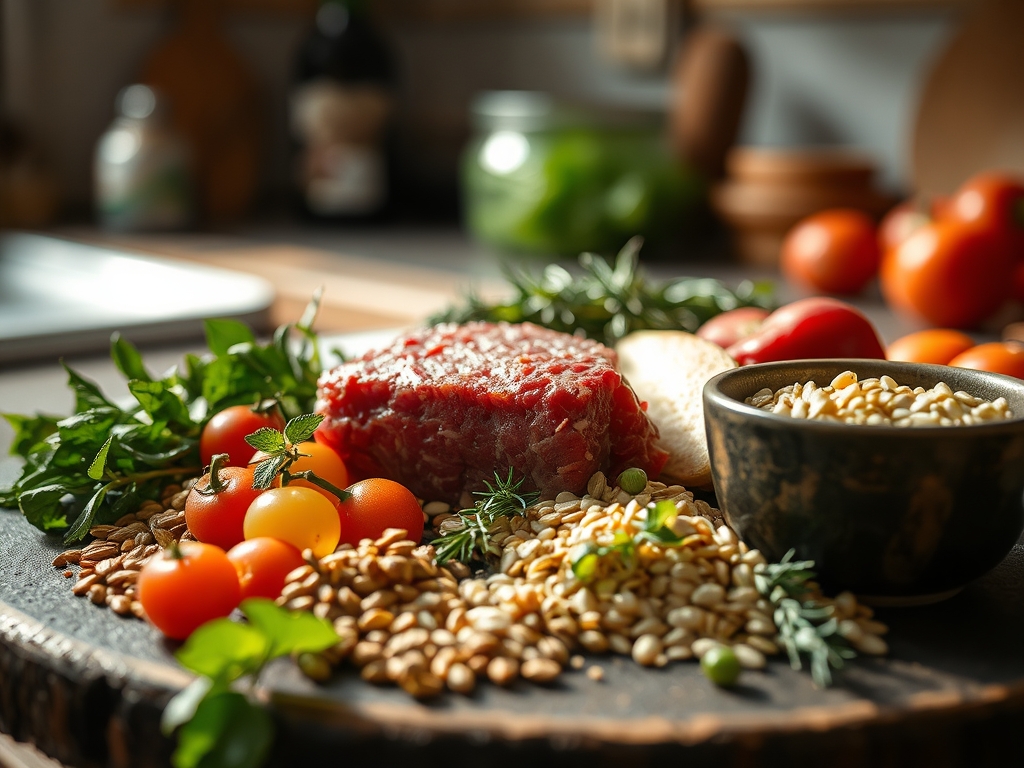
Before we ignite the flame, we must respect the mise-en-place. Your workspace should look like a laboratory of flavor. We start with the protein: look for an 80/20 blend. The 20 percent fat content is not just for flavor; it is a structural necessity for a juicy mouthfeel and serves as the primary heat transfer medium in the pan. You will need a piquant array of aromatics: think garlic cloves ready for the microplane, shallots for a delicate sweetness, and ginger to provide a sharp, bright counterpoint to the rich lipids.
For the liquids, we focus on viscosity and depth. Keep high-quality soy sauce, balsamic glaze, and a rich beef bone broth nearby to deglaze the pan and scrape up those precious brown bits. Smart Substitutions are your best friend here. If you are out of fresh garlic, a dash of high-quality garlic oil provides that essential sulfurous punch without the risk of burning. If your pantry lacks heavy cream for a stroganoff-style finish, a dollop of Greek yogurt or silken tofu can provide that same creamy texture while adding a probiotic boost. Always have a bench scraper ready to move your chopped aromatics from the board to the skillet with surgical precision.
The Clock: Chef's Flow
Efficiency in the kitchen is not about moving fast; it is about moving smart. This is what professionals call the Chef's Flow. Your total prep time for these eight variations should never exceed ten minutes. The cooking phase is a sprint, usually clocking in at twelve to fifteen minutes. The secret lies in the sequence.
Start by tempering your beef; let it sit on the counter for ten minutes to take the chill off. Cold meat hitting a hot pan causes the muscle fibers to seize, squeezing out moisture and leaving you with a gray, boiled texture. While the meat tempers, use your digital scale to measure out your sauces and your microplane to prep the aromatics. By the time your heavy-bottomed skillet is screaming hot, your ingredients are staged and ready for their entrance. This synchronized approach ensures that nothing overcooks while you are fumbling with a jar lid.
The Masterclass:

1. The High-Heat Sear
Place your beef in the skillet in one large, flat disc. Do not break it up immediately. Let it sit undisturbed for three minutes until a deep, dark crust forms.
Pro Tip: This is the Maillard reaction in action. By resisting the urge to stir, you allow amino acids and reducing sugars to rearrange into hundreds of flavor compounds that provide that "meaty" essence.
2. The Aromatic Infusion
Once you flip the beef, push it to the perimeter of the pan and drop your aromatics into the center. Use your tongs to swirl them in the rendered fat until they become translucent.
Pro Tip: Fat is a solvent. By blooming your spices and aromatics in the hot beef tallow, you are extracting fat-soluble flavor molecules that water-based liquids simply cannot reach.
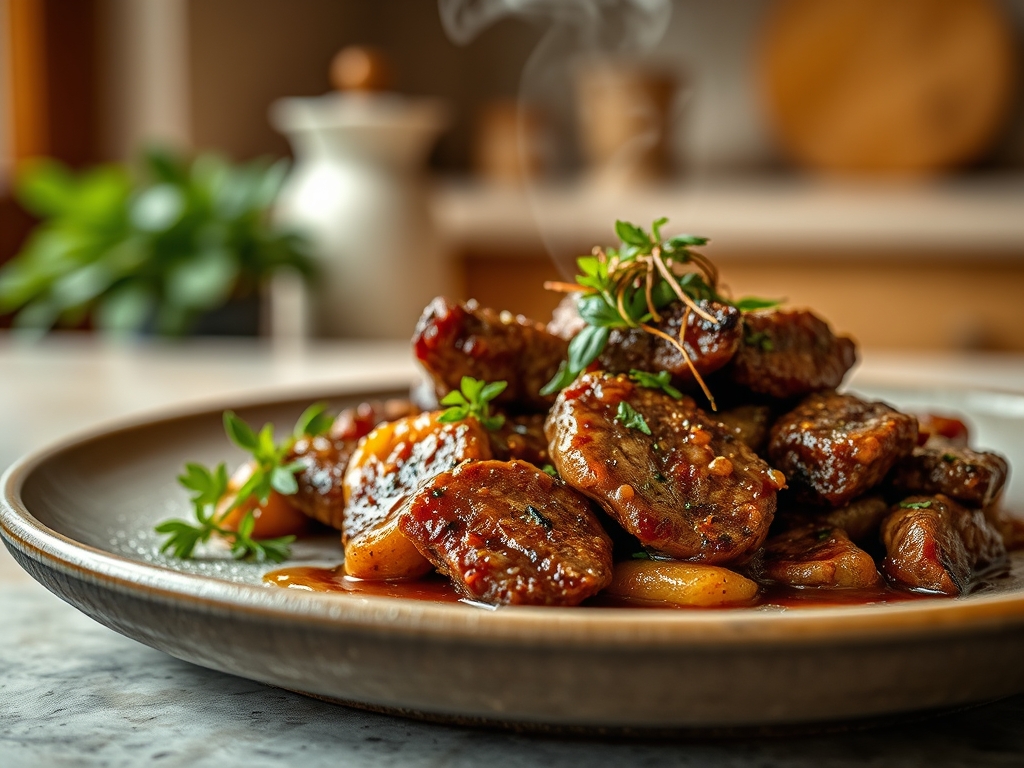
3. The Deglaze and Emulsify
Pour your liquid components into the hot pan. Use a wooden spoon to scrape the bottom of the skillet, loosening the fond. Stir vigorously as the liquid reduces.
Pro Tip: This creates a pan sauce emulsion. The gelatin in the beef juices acts as a stabilizer, binding the water and fat together into a glossy, viscous coating that clings to every morsel.
4. The Thermal Rest
Remove the pan from the heat when the beef is just slightly underdone. Let it sit for two minutes before serving.
Pro Tip: This utilizes thermal carryover. The internal temperature will continue to rise by five degrees, finishing the cook gently without toughening the proteins or drying out the dish.
The Deep Dive:
From a macro nutrition perspective, these gr beef recipes are a powerhouse. A standard four-ounce serving provides roughly 28 grams of high-bioavailability protein, essential B-vitamins, and zinc. For those following a Keto lifestyle, the high fat-to-protein ratio is a perfect fuel source. If you are Gluten-Free, simply swap soy sauce for liquid aminos or tamari. For a Vegan twist, high-quality pea-protein crumbles behave almost identically to beef in a high-heat skillet, though you may need to add a teaspoon of neutral oil to mimic the natural rendering of animal fat.
The Fix-It: Even pros run into trouble. If your beef looks gray and "soupy," you likely overcrowded the pan, causing the meat to steam in its own moisture. Fix this by straining the liquid and returning the meat to a dry, hot pan with a splash of oil. If the dish is too salty, add a splash of acid like lime juice or rice vinegar to brighten the profile and cut through the sodium. If the meat is tough, you likely over-mixed it; next time, handle the raw beef as little as possible to prevent the proteins from cross-linking into a rubbery texture.
Meal Prep: To maintain "day-one" quality when reheating, avoid the microwave if possible. Instead, use a saucier over medium heat with a tablespoon of water or broth. This creates a small amount of steam that re-hydrates the protein fibers and restores the emulsion of the sauce without overcooking the meat.
The Wrap-Up:
Mastering these gr beef recipes turns you into a kitchen alchemist. You are no longer just "making dinner"; you are manipulating heat, fat, and acid to create something extraordinary. Remember that the best meals are built on a foundation of technique and high-quality tools. Whether you are whipping up a spicy Korean-inspired bowl or a classic savory ragu, the principles of the sear and the deglaze remain your North Star. Now, grab that skillet and show that pound of beef who is boss!
The Kitchen Table:
How do I prevent ground beef from becoming greasy?
Drain the excess rendered fat after the initial browning phase but before adding your aromatics. Leave about one tablespoon of fat in the pan to carry the flavors of your spices and ensure a silky mouthfeel without an oily residue.
Can I freeze these recipes after cooking?
Yes, ground beef dishes freeze exceptionally well. Ensure the mixture has cooled completely to prevent ice crystal formation. Store in airtight containers for up to three months. Reheat gently with a splash of liquid to restore the original sauce consistency.
What is the best way to break up ground beef?
Use a sturdy wooden spoon or a specialized meat masher tool once the initial sear is established. For a fine, uniform texture ideal for sauces, a potato masher works perfectly to break down large clumps into small, flavor-absorbing crumbles.
Why does my ground beef taste bland?
You likely under-salted during the browning phase. Salt draws out moisture and intensifies the natural beef flavor. Always season the meat directly in the pan, and add an acidic finish like lemon or vinegar to make the savory notes pop.